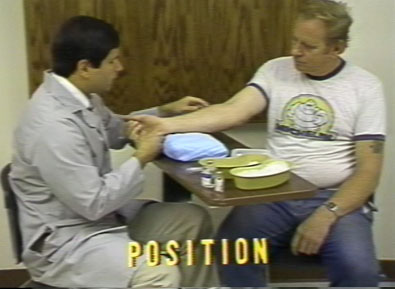
Before beginning the actual procedure it is a good idea to make sure the patient
is seated comfortably. He should rest his arm
on a pillow in front of him, palm facing up. This position is necessary to perform the
procedure and is the most comfortable for the patient.
Assess the patency of Ulnar artery and adequacy of distal arteries to wrist by Allen
test. Rest patients hand in his lap, palms up. Clenching of fist blanches skin of
the palms. Now compress Radial artery and have patient relax hands in partly flexed
position. Normally the skin should turn pink indicating normal Ulnar artery and collateral
flow. If there is a problem select a different artery for arterial puncture.
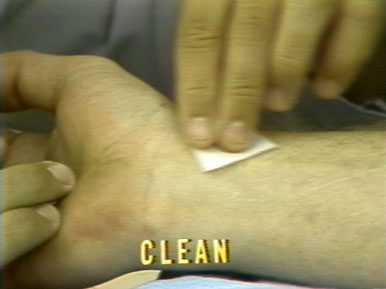
Next, the area over the radial artery should be cleaned with alcohol wipes.
Wear gloves.
Draw 2% xylocaine into a syringe. Infiltrate the
skin and the area around the radial artery with this local
anesthetic.
Next, draw heparin into a glass syringe. Rinse
the syringe with the heparin and then empty the syringe. Kits nowadays have
pre-heparinised syringes, in which case skip this step.
The small amount of heparin left in the needle and syringe is sufficient.
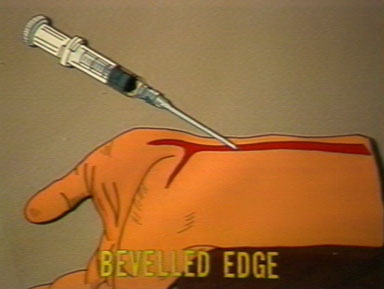
Hyper extend the patient's hand to stretch the
radial artery. Line up the artery with two
fingers with the beveled edge facing upper
portion of the vessel. Enter the artery and attempt to go through and through the vessel.
Slowly withdraw the syringe, stopping as soon as it begins to fill
spontaneously.
Withdraw the needle while applying pressure to the vessel with gauze.
Expel any air from the syringe and then
cap the needle. Caution. Leave
the cap on table and thread the needle into it to avoid accidental needle
puncture
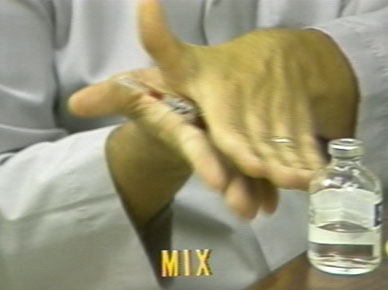
Gently roll the syringe between the palms of your hands to mix the heparin with the blood.
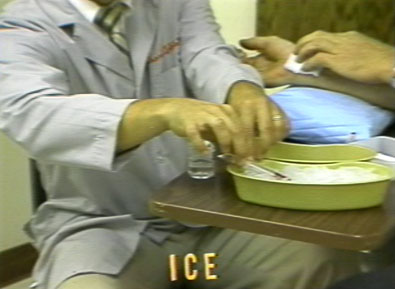
Place the syringe in ice and send the
specimen immediately to the lab for analysis.
Either you or the patient should keep applying
pressure to the vessel for a few minutes. Then apply a band-aid and the procedure is
complete.